In the world of home fragrance and wellness, crystal candles have emerged as a standout trend. They are more than just a source of light and scent; they are a fusion of aesthetic decor and metaphysical energy . As a factory with over a decade of experience in fragrance production, we understand the importance of marrying quality craftsmanship with consumer trends.
Whether you are a brand looking to expand your product line or a DIY enthusiast wanting to create a personalized gift, this guide will walk you through the professional steps of making your own crystal candle. We will cover the materials, the methods, and most importantly, the safety protocols to ensure a beautiful and safe finished product.
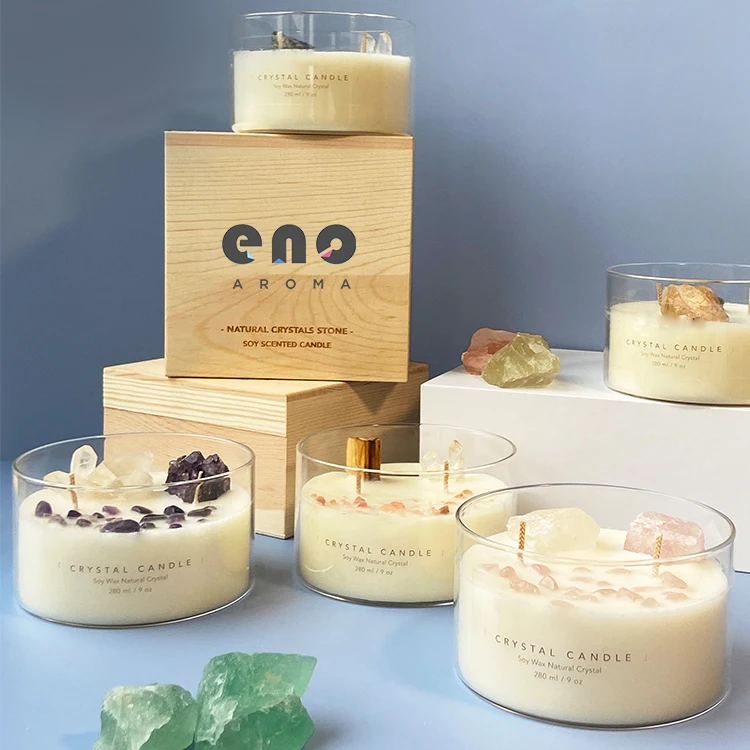
What Exactly is a Crystal Candle?
Crystal candles are beautifully crafted candles that incorporate crystal elements for both aesthetic and functional purposes . They are designed to enhance the ambiance of any space with their unique designs and soothing light . The crystals are believed to harness positive energies, infusing the surrounding atmosphere with vibrations of healing, love, or prosperity .
From a manufacturing perspective, these candles are typically made by embedding crystal chips within the wax or arranging them on top . The choice of crystal—whether it’s calming Amethyst or love-attracting Rose Quartz—allows the creator to set a specific intention for the candle .
Safety First: Crucial Considerations
Before we dive into the step-by-step guide, it is vital to address safety. Working with hot wax and flammable materials requires respect and caution.
- Crystal Safety (Thermal Shock): While crystals have high melting points, they can crack or even shatter if subjected to rapid temperature changes (thermal shock) . Never pour boiling hot wax directly onto cold crystals .
- Crystal Selection: Not all crystals are created equal. The quartz family (clear, rose, smoky, amethyst, citrine) , along with jaspers, agates, and tiger’s eye, are generally heat-resistant and safe for embedding . Avoid stones like Opal, Turquoise, or any porous or oiled stones, as the heat and wax can damage them.
- CRITICAL WARNING: Never use Malachite in candles, as it can release toxic fumes when heated .
- Wax Safety: Always melt wax using a double boiler or a dedicated wax melter. Never melt wax directly on a stovetop, as it can overheat and become a fire hazard . Ensure your workspace is well-ventilated .
- Burn Time Protocol: When burning the finished candle, it is recommended to stop using the candle when only 1/2 inch of wax remains at the bottom to prevent the glass from overheating .
Gathering Your Materials and Supplies
To achieve a professional result, using the right tools is half the battle. Here is your essential shopping list:
The Wax: For beginners, soy wax is highly recommended. It is natural, burns cleanly, and has a lower melting point, making it forgiving to work with . Beeswax is another excellent natural option .
The Container: A heat-resistant glass jar (like a Mason jar) or a ceramic vessel works best . Ensure the container is wide-mouthed to easily arrange your crystals .
The Crystals:
- For Love: Rose Quartz chips .
- For Calm: Amethyst chips .
- For Abundance: Citrine chips .
- For Protection: Clear Quartz or Black Obsidian .
The Wick: Choose a cotton or wood wick size appropriate for the diameter of your container. Use a wick sticker to secure it to the bottom .
Fragancia: High-quality essential oils or skin-safe fragrance oils. About 1 oz of oil per pound of wax is a standard ratio .
Tools: - Double boiler or a heat-safe pouring pot .
- Thermometer (to monitor wax temperature) .
- Stirring sticks (wooden or silicone).
- Wick holder or a pencil to keep the wick centered.
- Heat gun (optional, but recommended for a smooth finish) .
Step-by-Step Guide to Making Your Crystal Candle
Now that you have your workspace prepped and your materials ready, let’s begin the process.
Step 1: Prepare the Container and Wick
Clean and dry your glass container. Secure the metal tab of your wick to the center of the bottom using a wick sticker or a dab of hot glue. Wrap the top of the wick around a wick holder or a pencil laid across the top of the container to keep it taut and centered .
Step 2: Melt the Wax
Place your wax in the double boiler and heat it gently. If you are using soy wax, heat it to around 185°F (85°C) . Use your thermometer to monitor the temperature closely .
Step 3: Add Scent and Color (Optional)
Once the wax has fully melted, remove it from the heat. Allow it to cool slightly to about 175°F (80°C) , then stir in your fragrance oil and any liquid dye . Stir gently but thoroughly to incorporate the oil without creating air bubbles.
Step 4: The First Pour (The Base Layer)
Pour a thin layer of the melted wax—about 1/4 inch—into the bottom of your prepared container . Let this layer cool until it becomes "tacky" (semi-solid). This creates a sticky base that will prevent your crystals from sinking all the way to the very bottom .
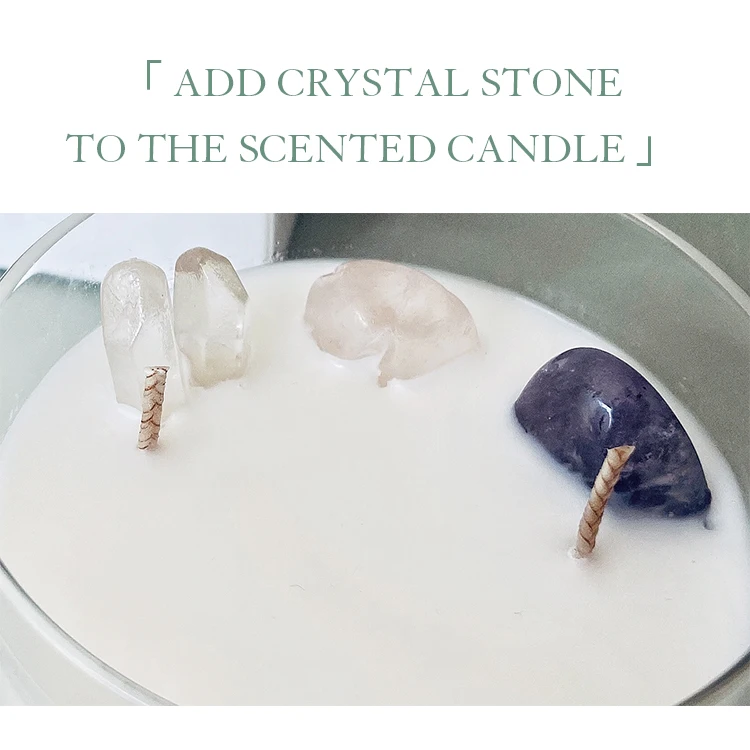
Step 5: Add Your Crystals
This is where you get creative.
- For the Embedded Method: Sprinkle a layer of crystal chips onto the tacky base. Then, slowly pour another layer of wax over them. You can repeat this process (wax, crystals, wax) to create the illusion that the crystals are floating throughout the candle .
- For the Crystal Crown Method: If you prefer the crystals to sit on top (this is safer for larger stones), pour all the wax at once, leaving about 1/2 inch of space at the top. As the wax cools and becomes tacky, arrange your crystals on the surface .
Professional Tip: If the surface becomes too solid before you finish decorating, you can use a heat gun to gently melt the very top layer of wax. This allows you to place crystals on a smooth, glossy surface and ensures they are securely set .
Step 6: Cool and Set
Allow the candle to cool completely and undisturbed for at least 4-6 hours, or ideally overnight . Cooling slowly helps prevent cracks and sinkholes around the wick. Do not move the candle while it is setting.
Step 7: The Final Touch
Once solid, trim the wick to about 1/4 inch above the wax surface . If you notice any small gaps around the wick from the cooling process, you can do a second "touch-up" pour with a tiny bit of reserved melted wax.
Crystal and Scent Pairing Guide
To help your B2B clients market these candles effectively, here is a popular pairing guide based on intention :
| Intention | Recommended Crystal | Complementary Scent |
|---|---|---|
| Love & Self-Care | Rose Quartz | Rose, Ylang Ylang, or Vanilla |
| Calm & Relaxation | Amethyst | Lavender or Chamomile |
| Abundance & Success | Citrine | Sweet Orange, Cinnamon, or Patchouli |
| Protection & Grounding | Black Tourmaline or Smoky Quartz | Sage, Cedarwood, or Frankincense |
| Mental Clarity | Clear Quartz or Tiger’s Eye | Peppermint or Lemon |
Conclusion: Crafting with Confidence
Creating DIY crystal candles is a rewarding process that blends art, science, and spirituality. Whether you are prototyping for a new collection or crafting a personal gift, following these steps will ensure a product that is not only visually stunning but also safe to burn.
Remember, the key to a high-quality candle lies in the details: accurate temperature control, proper wick selection, and secure crystal placement .
At [Your Factory Name] , we specialize in bringing such creative concepts to life at scale. With 10+ years of experience in wax formulation and fragrance casting, we understand the nuances of creating commercial-grade crystal candles that are safe, consistent, and beautiful.
Looking to launch your own line of crystal candles? [Contact us] today to discuss your private label or wholesale manufacturing needs. Let’s turn your vision into a bestseller.
Keywords: DIY Crystal Candle, Candle Making Guide, Wholesale Crystal Candles, Private Label Candles, Candle Manufacturing, Soy Wax Candle, Aromatherapy Candle.